
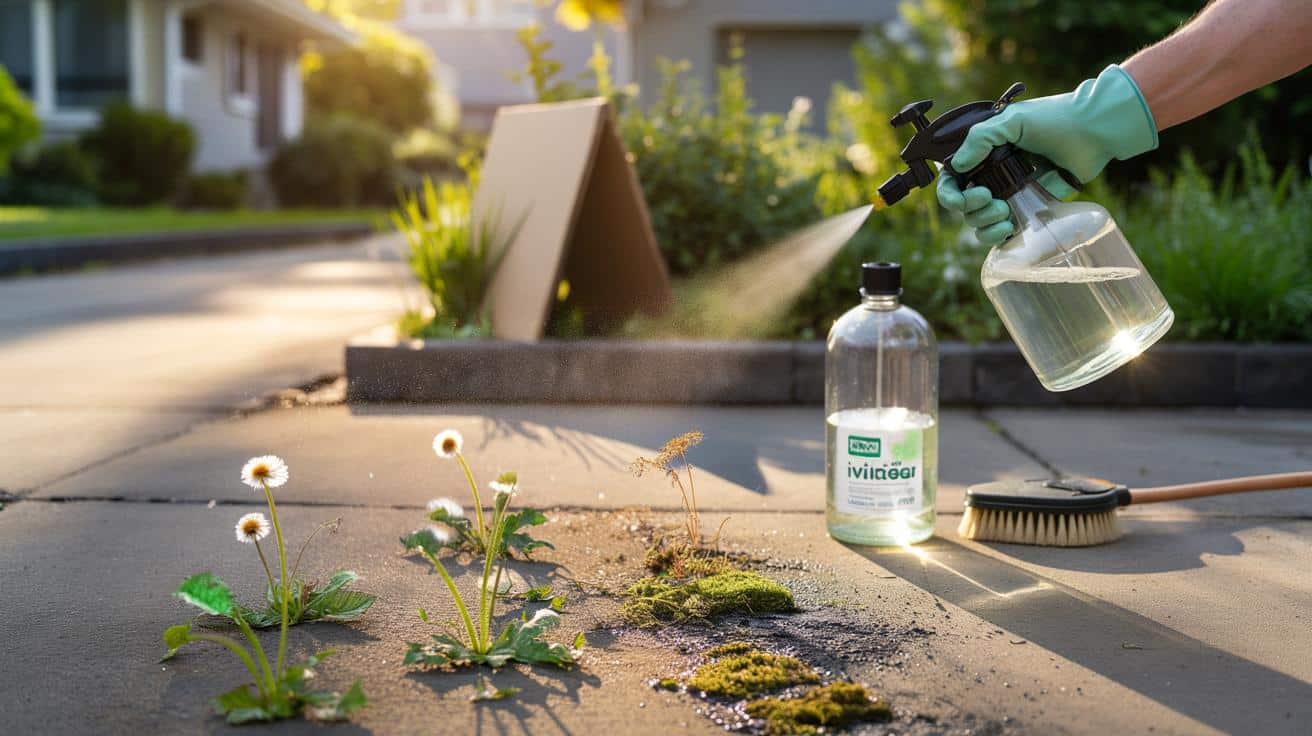
Weeds wink from the cracks, a ghost of moss slicks the edges, and there’s that faint grime that never quite shifts with a quick hose. You could reach for a heavy chemical, or you could open the kitchen cupboard and find something humbler. A bottle you already own. A smell you know.
It was a warm Saturday, the kind where the light sticks to the pavement. I watched my neighbour stroll out with a spray bottle, not a contractor’s rig, just a clear plastic sprayer and a jug of white vinegar. He misted the cracks, moved slowly, then went back inside for tea. The scent rose in the air like a seaside chip shop had taken a wrong turn. The air smelled faintly like chips. Hours later the dandelions had collapsed as if embarrassed to be seen. What happened next felt like cheating.
Why a splash of vinegar changes your driveway fast
Vinegar’s secret is simple: acetic acid. On contact, it strips moisture from the top growth of soft weeds and disrupts cell walls, so leaves wilt quickly. On sunlit concrete, this happens even faster because heat speeds evaporation and stress. You spray in the morning, the plants look tired by lunch, and by evening they’re crisp around the edges.
A friend in Leeds did a side-by-side test on a row of young weeds in block-paving. On one half, she used standard supermarket vinegar (around 5% acetic acid). On the other, she left it alone. After six hours of midday sun, the treated leaves had turned from glossy green to a dull khaki, and the untreated side still waved in the breeze. Two days later, the sprayed cracks were quiet, and the ants had rerouted their little motorway.
There’s more going on than a quick scorch. Acetic acid lowers the surface pH for a short window, which stresses tender growth and disrupts microbial films that help moss cling. It can also help loosen light mineral haze and salt marks that winter leaves behind. On sealed or coloured surfaces, though, repeated acid exposure can dull the finish. Use it like a spot treatment, not a daily ritual.
How to use vinegar on your driveway—step by step
Pick a dry, bright day with little wind. Fill a hand sprayer with white distilled vinegar, either neat for young weeds or diluted 1:1 with water if you’re cautious about surfaces. Aim at leaves, not the soil, and spray until they glisten but don’t drip. Let the sun do its work for a few hours, then brush back the browned growth and lift out the roots with a thin weeder.
Shield nearby plants with a piece of cardboard and go slow around lawn edges. Skip rainy days, as water dilutes the acid and blunts the effect. Never mix vinegar with bleach, because the reaction releases toxic gas—never mix vinegar with bleach, full stop. If your driveway is newly sealed or tinted, patch-test a discreet corner and wait 24 hours. Let’s be honest: nobody actually does this every day.
If you’re dealing with moss on concrete, mist a light coat, wait until it dulls, then scrub with a stiff brush and rinse. For fresh oil smudges, add a squirt of washing-up liquid to help lift the grime after a vinegar pre-spray. Wear gloves if you’re using strong horticultural vinegar and keep pets indoors until the area dries. Choose a sunlit, dry day and the effect feels almost instant.
“The trick isn’t magic—it’s chemistry you can smell.”
- Spray early, let sunlight speed the wilt.
- Target leaves, not soil, to avoid deeper harm.
- Cardboard shield near prized borders.
- Patch-test sealed or coloured surfaces.
- Rinse edges if you overspray onto the lawn.
The quiet satisfaction of a simple fix
You wanted fewer weeds, less slime, and a cleaner first impression. Vinegar gives you that quick win without a trip to the garden centre or a hazmat suit. We’ve all had that moment when the path looks older than the house, and it nudges your mood every time you come home. A small change on the surface can reset that feeling in a single afternoon.
The beauty here isn’t about perfection. It’s about a habit you can repeat once a month when the weather plays along, then forget about until the next little green flag pops up. Share the trick with a neighbour, trade a splash for a spare bag of salt, and compare before-and-after photos across the fence. Small, doable, sharable—just the way the best garden hacks travel.
| Key point | Detail | Interest for the reader |
|---|---|---|
| Vinegar wilts weeds fast | Acetic acid dehydrates top growth in hours on sunny days | Quick visual payoff without harsh herbicides |
| Surface care matters | Patch-test sealed or coloured concrete; avoid soaking asphalt | Protects driveways from dulling or softening |
| Timing is everything | Spray on dry, bright days and keep it off nearby plants | Stronger results with fewer side effects |
FAQ :
- Will ordinary kitchen vinegar work, or do I need horticultural vinegar?Standard 5% white vinegar works on young, soft weeds and moss; stronger horticultural vinegar (10–20%) hits harder but needs gloves and goggles.
- Is vinegar safe for concrete?Occasional spot use is fine, yet repeated soaking can etch or dull the surface, especially on coloured or polished concrete—always test first.
- What about asphalt or newly sealed driveways?Go light and avoid prolonged puddling; acids can soften some sealers. Patch-test and use targeted sprays rather than soakings.
- Can I mix vinegar with other cleaners?Never with bleach. For greasy smudges, pair vinegar with a little washing-up liquid after the initial spray, then scrub and rinse.
- Is it safe around kids and pets?Yes once dry, but keep them off while the area is wet and ventilate if you’re using higher concentrations to avoid eye or skin irritation.


This actually explains why my ‘natural’ weed sprays only worked on sunny days—the acetic acid + heat combo is doing the heavy lifting. I tried 5% white vinegar this morning and by late afternoon the dandelions already looked tired. Question: on coloured, sealed concrete, do you recomend diluting 1:1 every time, or is a neat spot treatment fine so long as you brush and rinse? I really don’t want to dull the finish again; learnt that the hard way last summer.